Wear Wings.
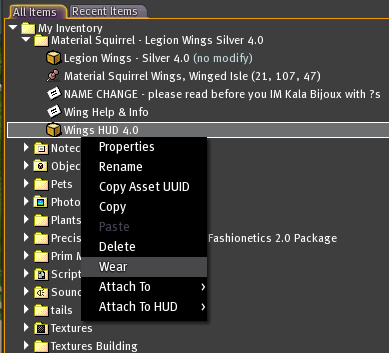
To wear, right click and select wear.
Getting Started
Wings Commands
Settings
Xcite Tab & Turning off Xcite features
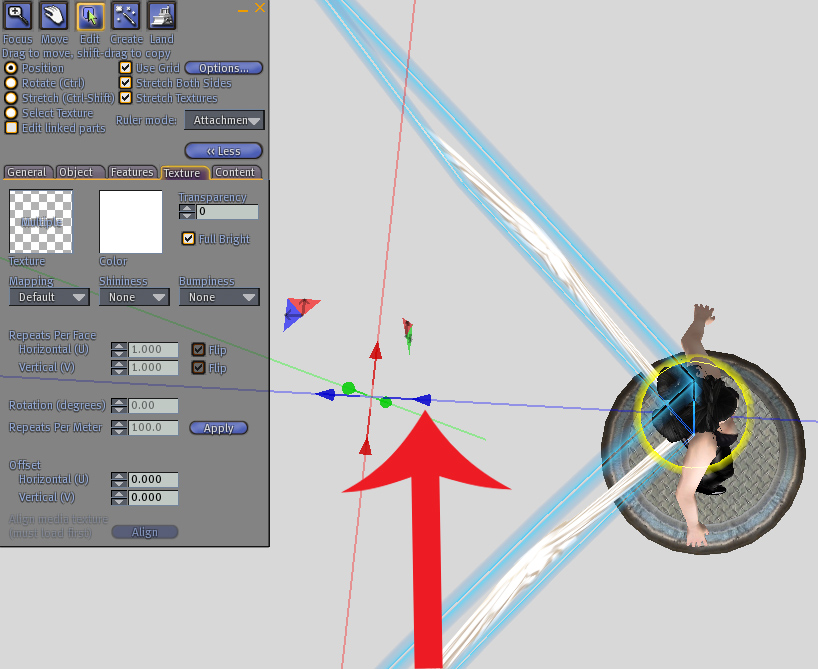
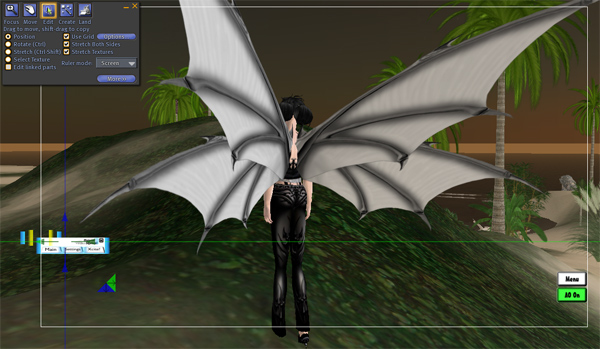
Editing Wing Position
HUD Positions
Contact
Wear HUD.
Wear Wings.
To wear, right click and select wear.
Or you can drag it onto your avatar.
Do NOT attach the wings or the HUD by using the "Attach to" option - unless you attach it to the spine.
For users that want to use an alternative attach point please see Attach positions
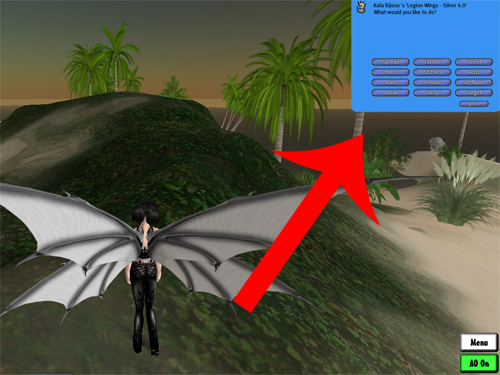
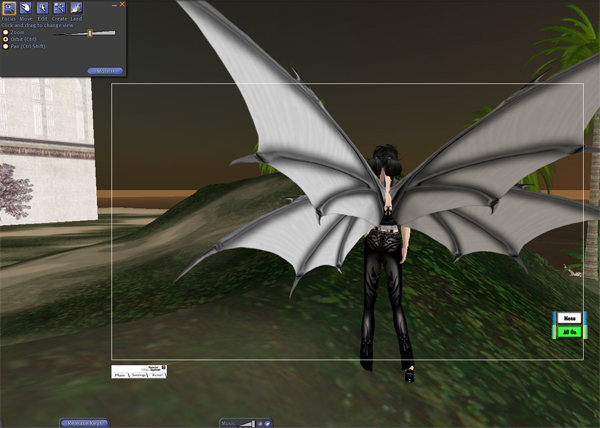
After wearing both the wings and the HUD, your screen should look like the picture below.
The HUD will attach to the top left corner of your screen.
To reposition HUD, please see HUD positions.
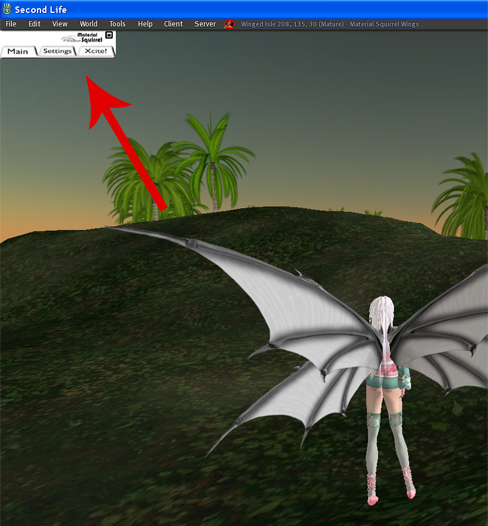
To open HUD, click on any of the tabs and it will open to the full HUD menu.
Having Trouble?
If you are having trouble with the wings, PLEASE see the trouble shooting guide.
All wings commands, including the Xcite commands, are available on the HUD.
The Xcite commands are also available (or can also be accessed) by touching the wings, if the Touch/Xcite function is turned on. Please see Xcite Info.
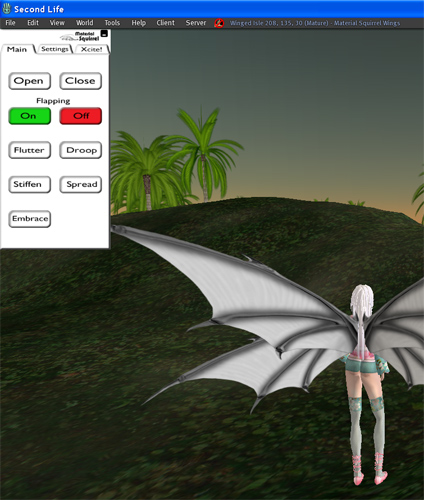
The HUD contains 3 tabs - Main, Settings, and Xcite.
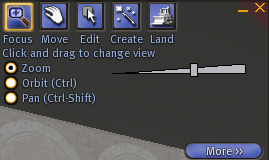
Open & Close - Makes the wings open & close. The wing feathers will actually disappear, allowing you to build and click on other objects without the wings getting in your way.
To adjust the settings of your wings, go to the setting tab on the HUD.
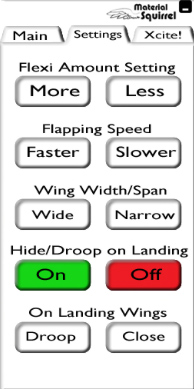
Flexi Amount Setting - Increases or decreases flexiness of the feathers
Flapping speed - Increases or decreases the wing flapping speed.Ā It may take a few seconds for the new speed to be applied
Wing Width/Span - Moves the spread of the feathers further apart or closer together.
Hide/Droop on Landing - If you turn this feature on, your wings will droop or close when you are on the ground. When you start to fly, the wings will open or undroop.
On Landing Wings Droop/Close - Sets which option you would like on the ground.
Xcite Tab & Turning off Xcite features
The Xcite features are available from the Xcite tab on the HUD.
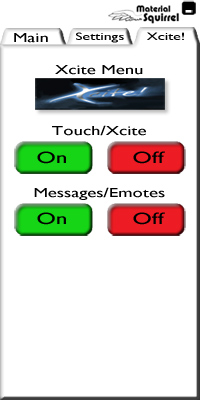
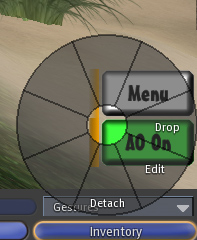
Xcite Menu - (that blue button that says Xcite!) Clicking on this will bring up the blue Xcite menu with buttons.
Touch/Xcite On/Off - turns Xcite features on or off. Turns the touch wings for Xcite menu on or off.
Messages On/Off - turns on or off the green emote messages.
You can also access the Xcite! features by touching the wings. You will see a blue panel.
If you do NOT want the Xcite features, you can turn these off by going to the Xcite tab on the Material Squirrel HUD and clicking the "off" button under Touch/Xcite.
Further Xcite info can be found in the Xcite! Guide.
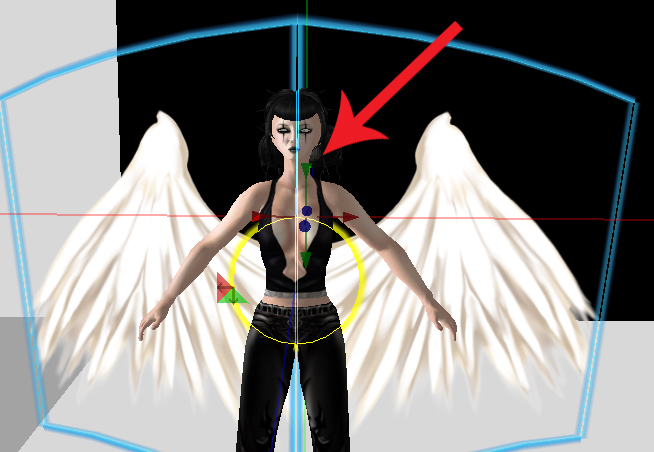
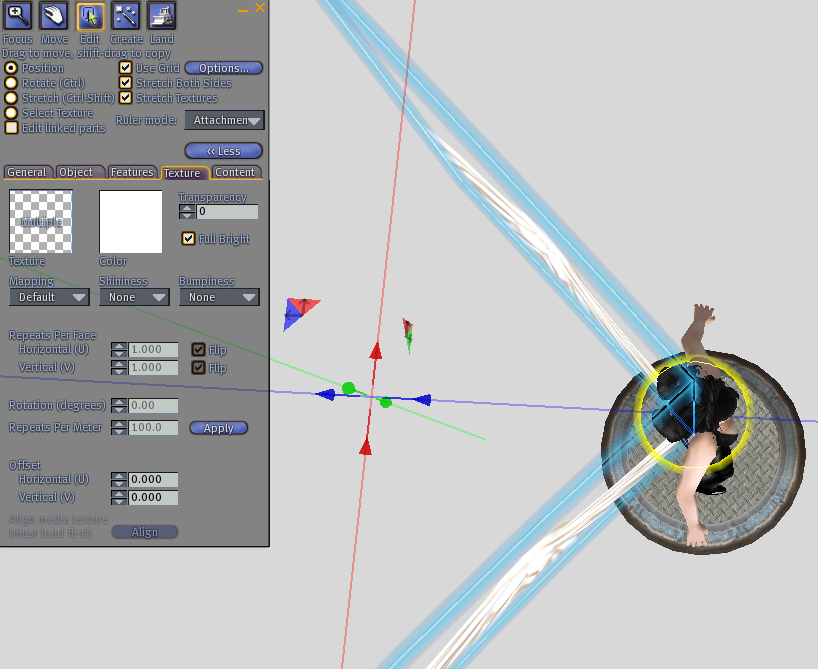
The wings are sold no modify, but you can still adjust how the wing sits on your avatar.
Follow these steps:
The HUD (Heads-Up Display) controller attaches to the top left of your screen
by default. The HUD attaches to your SCREEN, not to your avatar.
You can use a different HUD attachment point, but you may have to re-position the HUD to view all the buttons.
How to use a different HUD point
Repositioning the HUD requires an intermediate level of SecondLife skill and is not recommended for new users.

Please read the troubleshooting guide if you are having problems.
If these help documents do not answer your questions or solve the wing problems,please contact Kala Bijoux.